Learn how to feed and maintain a sourdough starter with this in-depth guide. Included is a troubleshooting reference, as well as essential equipment suggestions to use.
What Is A Sourdough Starter?
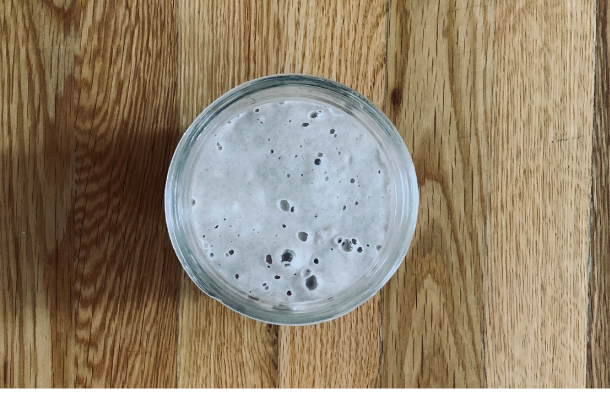
Let’s start from the beginning, and briefly go over what a sourdough starter is. I’m sure you know it can make some pretty delicious bread, which is the main reason why I created one for myself. But, there is so much science behind that glob of fermented flour and water, that once you understand how it works, it will be so much easier to care for it.
If you already have a sourdough starter in your hands, then you may (or may not) know that it contains a mixture of flour and water that has been fermented. Are you without a sourdough starter, but would like to make one? Please read this article on How To Create A Homemade Sourdough Starter. If you have a dry sourdough starter that you need to rehydrate, then jump on over to this article on How To Rehydrate A Dry Sourdough Starter.
A sourdough starter is used in recipes to create leaven. Leaven is the rise in bread and baked goods, and typically, yeast is the source behind that. You can buy a little yeast packet at the grocery store to create leaven in a bread recipe, but in this case, a homemade sourdough starter will be used. A sourdough starter not only creates leaven, but adds that distinct flavor we all know and love. That flavor develops over the life of the starter, which is why it’s important to feed it and maintain it.
Why Do You Need To Feed A Starter?
Fermentation occurs when the combined water and flour are left to sit loosely covered at room temperature (ideally 70-75 degrees Fahrenheit) to collect the natural strains of wild yeast and lactic acid bacteria in the air. These “bugs” as my 4 year old likes to call them, feed on the flour and water combination (carbohydrates) and convert those starches into carbon dioxide. The carbon dioxide is what gives your bread that rise when baking. Once these beneficial microbes run out of food, you then need to feed them. If they are not fed, the starter looses it’s effectiveness, and potentially those microscopic bugs will die.
Just as important as it is to feed your starter, you must also remove some of it. When you discard a portion of your starter, you are removing the excess metabolic waste created by those microbes. Discarding also allows your starter to not grow out of it’s container and keep it as a manageable amount for your baking needs. You should always maintain at least a 1/2 cup of starter.
Not All Flour And Water Is Created Equal
Flour
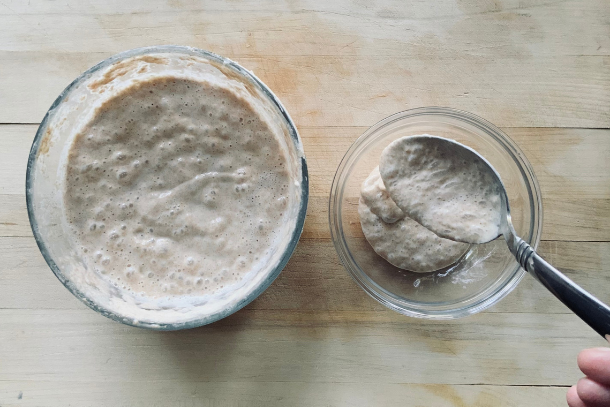
The type of flour (or combination of flours) you use to feed your starter, determines the amount of water to add, as well as the final consistency of your starter. It also determines the nutritional content of your baked goods, and the overall flavor. This is because not all flours are created equal.
Included below is a list of different white and wheat flours that make great options to feed your starter with:
- Unbleached All Purpose Flour – If you choose to use this white flour, make sure it is unbleached. This will ensure the integrity of the cultures in your starter stay healthy. AP is a great option because it is widely available and low in cost. However, it’s protein content (10-12%) is not as high as bread flour.
- Bread Flour – Another great white flour option, and higher in protein content (12-14%). This flour brings strength and structure to doughs, and is best used for leavened breads.
- Whole Wheat Flour – This wheat flour produces heavier and denser baked goods, so it is best used in combination with a white flour. Wheat flours are also more active in rising than white flours.
- Einkorn – Apparently, one of the most primitive forms of grain. Einkorn has a high nutritional profile, and is easier to digest due to it’s low gluten content.
- Rye – Contains more soluble sugars, so it ferments faster. Also has a significant amount of fiber and a good taste.
We use organic bread flour to feed and maintain our sourdough starter. Right now, that combo is organic bread flour and organic whole wheat flour. We choose to purchase organic flour to avoid pesticides and other harmful chemicals. Those chemicals could also potentially delay or harm your starter by inhibiting the growth of beneficial yeast and bacteria.
Water
As previously mentioned above, avoiding extra “junk” in your ingredients reduces the risk of contaminating your starter. Just like you would choose organic flours, you also need to use non-chlorinated water. Chlorine can inhibit the growth of good bacteria and yeast that we want to thrive in our starter. It can be removed by running your water through a filter designed to remove chlorine (a basic carbon filter like in the fridge door dispenser or water pitcher should work), or you can leave the water uncovered on your counter for 12-24 hours to allow the chlorine to dissipate.
You also need to use room temperature water when feeding your starter. Leave your water out on the counter to bring it to room temp, or if you’re like me and don’t have time for that, you can throw it in the microwave for 30 seconds to warm it up. Do not use hot water! Just lukewarm or room temperature water.
Equipment Needed
Storage Container
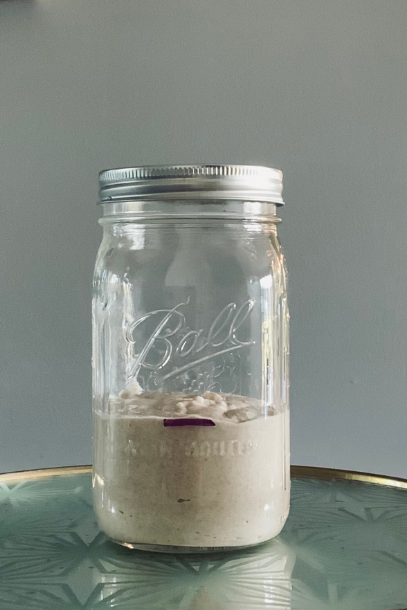
Your sourdough starter will need a home big enough to allow it to triple in size. How much starter you keep depends on how often you bake. For us, we make 1-2 loaves of bread a week, and then use the discarded portion for pancakes. A typical loaf of sourdough bread will call for approximately 100g of starter, so you will need to maintain 100g of starter, plus extra for feeding and discard, if that’s the baking schedule you want to maintain.
A non-reactive container with a loose-fitting lid is an ideal home for your starter. You do not want it to be air tight. A mason jar with the lid and ring loosely screwed on, a flip top glass jar, or a ceramic bowl are all great options. We use a large 1 liter mason jar for our starter.
Digital Scale
As you’ve come to realize, feeding a starter and baking sourdough recipes mainly calls for measurement in weight. You will need a small digital kitchen scale to help you with that.
Equipment Suggestions
Cast Iron Cookware – for baking bread
Banneton – for baking bread
Parchment Paper – for baking bread
How To Feed And Maintain A Sourdough Starter
Feeding By Weight
Wake it up: If you choose to store your starter in the fridge, you will need to pull it out and bring it up to room temperature. It is a good idea to know how much your storage container weighs, but if you do not know this, then set your glass or ceramic container on the kitchen scale and tare it (there should be a tare button on your scale to set it back to zero).
Weigh it: After your starter is awake, weigh it by pouring it into the container that is on the kitchen scale, or by weighing it in it’s original container (if you know the weight of the container already).
Discard: Now you will discard a portion of your starter until you have reached the desired amount that you will be using in your recipe. You can discard into a separate bowl to use in a ‘discard recipe.” You could also compost it, or we even like to feed it to our chickens.
Feed: Now it’s time to feed the beast! You will feed your starter equal weights of flour and water. Using the previously mentioned example, 100g of sourdough starter gets fed 100g of filtered, room temperature water, and 100g of organic flour. Store your fed starter at room temperature (ideally between 70-75 degrees Fahrenheit), and if you have a cooler home, keep it in the oven with the light on, but the oven off. The light will generate just enough heat to make your starter happy and bubbly. But, remember it’s in the oven before you turn it on to bake anything!
A Good Trick
Weigh your empty container that your starter will live in, and then weigh your container with your starter in it. This will give you a good visual on how much to discard and maintain. I know that if my starter comes about 2 inches up the side of the mason jar after discarding, it weighs a certain amount. Then I can add equal weights of flour and water to it. I almost never bring out the kitchen scale anymore to feed it because I know what the weight looks like, and I also know what the consistency looks like. I just “eyeball it.”
Feeding By Volume
You can also choose to veer off the beaten path of feeding by weight, and simply feed by volume. You can pre-weigh your ingredients to see what the weights look like in cup measurements, but I will give you a good idea of what it looks like. 1 part starter, 1 part water, and just under 2 parts flour. For our starter at home, I combine 1 cup of starter, 1 cup of water, just under 1 cup of bread flour, and just under 1 cup of whole wheat flour.
Starter Consistency
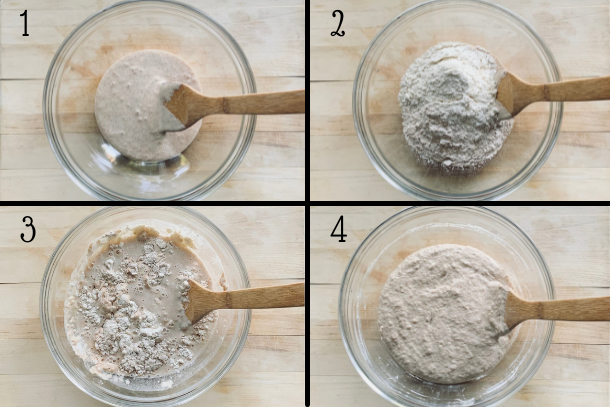
There is some personal preference when it comes to the starter consistency topic, but there are a few things you should know when trying to get it just right:
If your starter is too thin, the carbon dioxide gases will bubble, rise, and escape right out of the starter, not giving it the rise that you desire.
If your starter is too thick, the bubbles will have a hard time forming, and also not give it the rise that you are looking for.
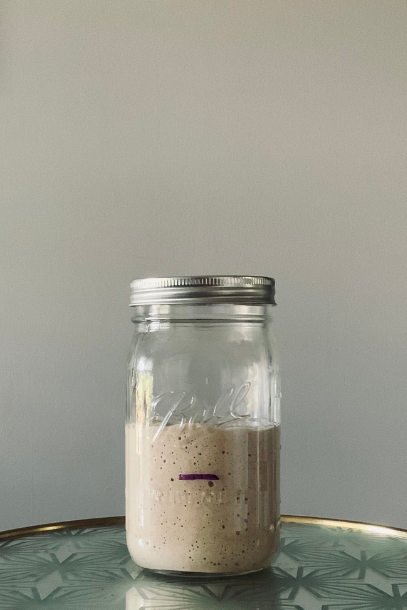
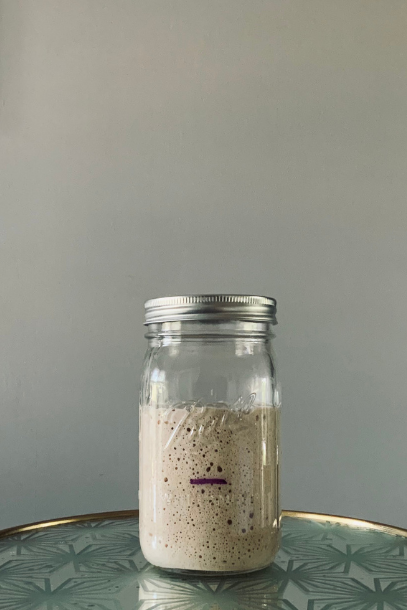
We are looking for that Goldilocks effect, and need the consistency to be just right. You don’t want it wet like milk, and on the flip side, you don’t want it so thick that it’s hard to pour or even forms a ball. You want it sticky, slightly thick, but still pourable. Like thick, spongy pancake batter. Bubbles will form a few hours after you feed it, which will cause the starter to rise, and you will continue to see these bubbles everywhere throughout the starter as it reaches peak activity.
I know that this may seem very confusing, but it’s one of those things that you’ll understand after some hands-on experience. Stick with me here!
How Often & When To Feed
How often you use your starter and where you store it determines the frequency in which you feed your starter. If you store your starter at room temperature, the wild yeast and lactic acid bacteria will be very active and hungry. It will need to be fed at least once a day. If you store your starter in the refrigerator, those microbes slow down and don’t eat as much. You only need to feed it about once every week, sometimes every 2 weeks. However, I wouldn’t push it that far if at all possible.
Since we use ours once or twice a week, I store mine in the refrigerator and pull it out the night before to let it wake up and warm up. I will then feed it the next morning (using the discard for sourdough pancakes), and sometimes even feed it again that afternoon (without discarding any, because I just did it earlier in the day) to get the amount and activity I need to start my recipe by that night. Typically, I’ll make my recipe and let it proof in the fridge or long ferment overnight, then bake it the next day.
It’s a long process, but a slow and beautiful one, and that’s what makes sourdough so special and unique.
What To Do After Using Your Starter
Now that you’ve fed your starter (after discarding a portion of course), and used your starter in a recipe, you should have some remaining in your container. So, what do you do with it? Well, thankfully sourdough starter can be quite forgiving, so there are a few options:
- You can toss it back in the fridge (assuming this is where it’s stored) directly after using it at peak or slightly after peak activity. This will leave you with less starter when you go to use it again, so the next time you use it, you may have to feed it without discarding any, and then feed it a second time.
- You can feed it (without discarding) and put it back in the fridge to let it slowly eat until you take it out to use again.
- You can feed it (without discarding) and let it sit at room temperature to feed for a few hours before placing it back in the fridge.
Either way, your starter will probably not suffer any. It’s mostly just based on personal preference, how often you use it, and where you normally store it.
Troubleshooting
As with any kind of fermentation, things can get confusing, look weird, and straight up smell “different.” Each sourdough starter is unique in it’s own environment, so this is not a one size fits all. However, there are some questions and concerns that come up often.
What is that dark color liquid on top of my starter?
That is what is called the hooch. Yes, you heard me right. The hooch is an alcohol that is naturally generated from the feeding wild yeast. You can either pour it off or mix it in, then do your discard and feed your starter. It will not harm your starter if you attend to it, but it’s a sure sign that your starter is a hangry beast and you are not feeding it enough. You will have to re-examine your feeding schedule and make adjustments.
My starter is not rising
If you’ve discarded and fed your starter, and then a few hours later there are bubbles but no big rise, you’re probably running it a bit on the thin side. The carbon dioxide bubbles are literally bubbling up and out of your starter and not staying in to create the rise you’re looking for. This is easily fixed by adding a tablespoon or two of flour to your mixture to thicken it up a bit. Remember, you want a thick, spongy pancake batter consistency, not thin and milky.
Pin For Later
Name Your Pet & Get Baking
Congratulations on adding a new living thing to your homestead! If you’re like me with countless human children, chickens, bees, and plant babies, what’s another mouth to feed?! HaHaaaa…
With a pet comes a name though, and I truly believe it’s bad luck not to name it. Ours is named Rita, and she has quite the bubbly personality. I know I need to get out of the house more often, but let me have my moment.
I now hope you feel somewhat prepared after reading about how to feed and maintain a sourdough starter. It can be a little overwhelming at first, but just dive in and start getting your hands dirty…or sticky with dough. You know what I mean. You’ll learn so much just from experimenting.
Happy baking my friends! I’m wishing you warm kitchens, fresh bread, and many memories with your sourdough starter.
Leave a Reply