I walk you through, step-by-step, on how to rehydrate a dry sourdough starter. Whether you purchased one from me or someone else, this process is simple and straightforward, and we’ll have you baking bread in no time!
What Is A Dry Sourdough Starter?
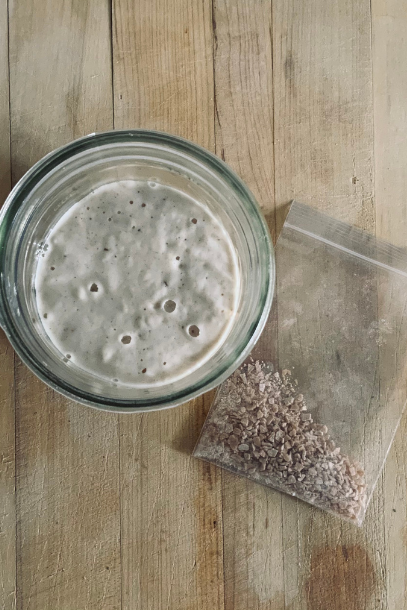
A dry sourdough starter is simply a starter that has been dehydrated and either ground finely or flaked into chips. Dehydrating the sourdough starter, preserves the wild yeast and lactic acid bacteria found in it. Those beneficial microbes are alive, but just in a dormant state. Rehydrating them with this simple process will wake them up and allow them to thrive so you can get your baking on!
If you have a dry sourdough starter that you purchased from me, then thank you for your support. If you are in need of a sourdough starter, you can purchase one here from my on-line storefront. If you already have one, but did not purchase it from me, no biggie! We can still be friends, so follow along.
Purchasing a dry sourdough starter allows you to jump into this sourdough game without having to make a starter from scratch. There is a significant amount of flour and commitment to get a starter, well, started! Our organic dry sourdough starters are made here in Central North Carolina from the mother starter that came to life in January 2021. When purchasing a dry starter, you’re getting your hands on a piece of already thriving and aged fermentation. Now, isn’t that cool?!
Equipment Needed To Rehydrate A Dry Sourdough Starter
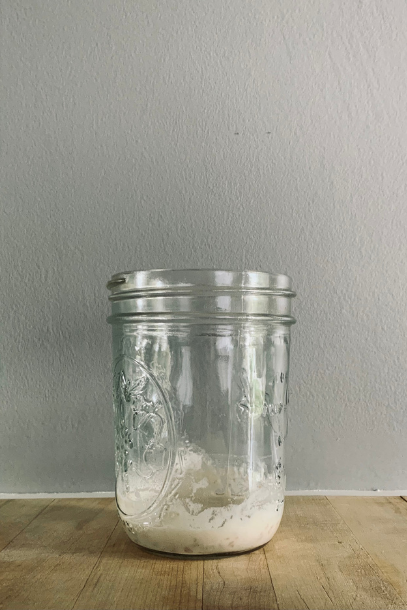
The most important item you will need to rehydrate your starter, is a non-reactive container to keep it in. A 1 quart glass mason jar makes a great final home, but you can start this process with a 1 pint glass mason jar. You could also use any glass or ceramic bowl, like these cute jars here.
In addition, these little silicone spatulas are wonderful to mix my starter with. They fit well in a mason jar or flip top jar, and since I don’t take my starter out of my mason jar to mix it, they make my life easier.
After you’ve completed rehydrating your starter, there a few additional pieces of equipment you’ll need to continue feeding it and to bake with. For example, a small kitchen scale. But, once you’ve completed the rehydration process, you can head over here to get information on feeding and maintaining the starter.
Ingredients Needed To Rehydrate A Dry Sourdough Starter
Flour
Below, you will find a list of flour options to use when rehydrating and continuing to feed your starter. We use organic bread flour to feed and maintain ours. For the sake of ease, I would use bread or all-purpose flour to rehydrate your starter. Afterwards, you can find a combination of flours that you enjoy best.
- Unbleached All Purpose Flour – If you choose to use this white flour, make sure it is unbleached. This will ensure the integrity of cultures in your starter stay healthy. AP is a great option because it is widely available and low in cost. It’s protein content (10-12%) is not as high as bread flour.
- Bread Flour – Another great white flour option, and higher in protein content (12-14%). This flour brings strength and structure to doughs, and is best used for leavened breads.
- Whole Wheat Flour – This wheat flour produces heavier and denser baked goods, so it is best used in combination with a white flour. Wheat flours also are more active in rising than white flours, so they are useful if you need to give a sluggish starter a quick boost.
- Einkorn – Apparently, one of the most primitive forms of grain. Einkorn has a high nutritional profile, and is easier to digest due to its low gluten content.
- Rye – Contains more soluble sugars, so it ferments faster. Also has a significant amount of fiber and a wonderful taste.
Water
Just like we use organic flour to keep the “junky” stuff out of our starter, you will also need to use non-chlorinated water. The chlorine can inhibit the growth of the good bacteria and yeast that we want to thrive in our starter. To remove the chlorine, you can run your water through a filter designed to remove it (a basic carbon filter like in the fridge door dispenser or water pitcher should work), or you can leave the water uncovered on your counter for 12-24 hours to allow the chlorine to dissipate. We have a Berkey water filter in our home, and that is what we use.
You also need to use room temperature water in your starter. You can leave your water out on the counter to bring it to room temp, or if you’re like me and don’t have the time for that, you can throw it in the microwave for 30 seconds to warm it up. Do not use hot water! Just lukewarm or room temperature water.
Dry Sourdough Starter
Of course, you will need your package of dry sourdough starter. If you have a package of my dry starter, it’s a little less than 1 tablespoon in measurement.
How To Rehydrate A Dry Sourdough Starter – Step-By-Step
Let’s do this! I will instruct you step-by-step for each day, which is over the course of 5 days. Don’t worry, this will take no more than 15 minutes of your day, I promise. Grab your dry starter and your container and let’s go!
Day 1
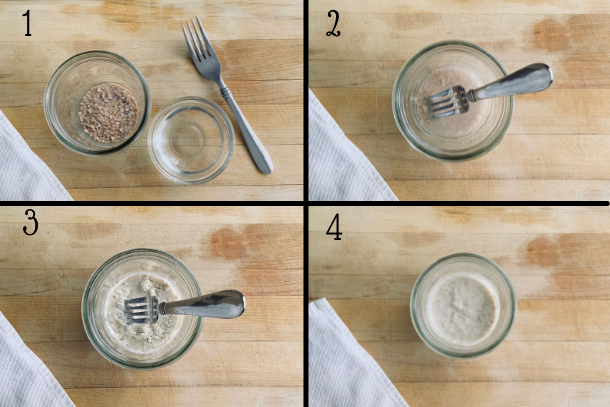
Get your jar or container of choice and pour in the entire contents of the dry sourdough starter (a little less than 1 tablespoon).
To the jar, add 1.5 tablespoons of filtered water (lukewarm or room temperature). Do not use cold water. Mix that lightly to ensure that it is all saturated, and let it sit for a few minutes.
Lastly, add 1 tablespoon of flour to the jar and stir well. Scrape down the sides and loosely cover the jar with a lid. It doesn’t have to be air tight. I just lightly spin my jar lid and ring on halfway. You’re just trying to keep debris out.
Place the jar in a warm space and come back 24 hours later.
Day 2
Add 1 tablespoon of flour and 2 teaspoons of filtered water to the same jar as yesterday. Mix well and scrape down the sides. Let it sit in the warm location again for 24 hours.
Day 3
You will repeat today, what you did yesterday. Add 1 tablespoon of flour and 2 teaspoons of filtered water. Mix well and set aside for another 24 hours.
You will probably see little signs of life today. A couple of bubbles maybe. However, over the next 24 hours, you may start to see some rise and an increase in bubble activity.
Day 4
Today is a big day! You are going to add more flour and water today because that starter is waking up from hibernation and is getting hungry. Your starter should smell like a bakery with those wild yeasts starting to dance around.
To your jar, add 1/3 cup of flour and 1/4 cup of filtered water. Mix it well, making sure the flour clumps are broken up, and then scrape down the sides. Cover and set aside for another 24 hours.
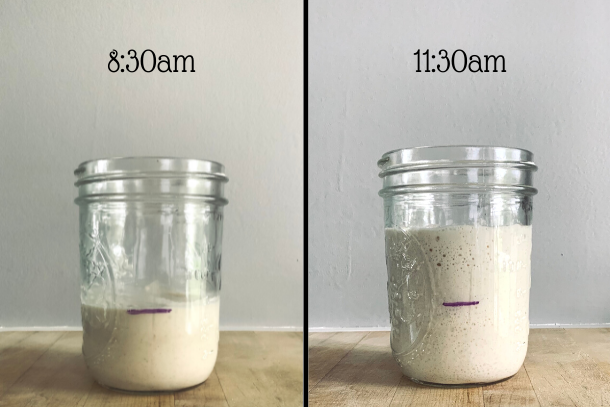
You are going to see the biggest rise and fall in the next 24 hours, so grab a dry erase marker or a rubber band to mark the level that your starter is currently at. This will be a fun experiment to see how much she grows.
Your starter will more than likely double in size. If it doesn’t rise much at all, you can reference the troubleshooting guide at the bottom of this article. Sometimes it’s just a matter of consistency or temperature. If it rises and falls back to the original marked level (you can tell by the smears on the side of the jar), then you’re heading in the right direction.
Day 5
If your starter has successfully started bubbling, and is rising and falling, then you can move her to a permanent home. Grab a larger container, like a 1 liter glass jar or bowl, and pour the entire contents of your starter into her forever home.
At this point, your starter is active enough to bake with – Yay! However, you will need to add a little more bulk, as you will want to leave a little bit of starter behind after using it to bake with.
So, to the larger container, add just under 1 cup of flour and 1/2 cup of filtered water, and mix well. Stir out any clumps of flour, cover, and set aside in a warm spot.
If you will be baking frequently (daily or every other day), you may want to repeat Day 5 for a Day 6. But, if you’ll be doing a weekly or twice a week baking schedule, then go ahead and toss that baby in the fridge after 24 hours of feeding.
Troubleshooting
As with any kind of fermentation, things can get confusing, look weird, and straight up smell “different.” Each sourdough starter is unique in it’s own environment, so this is not a one size fits all. However, there are some questions and concerns that come up often.
Consistency
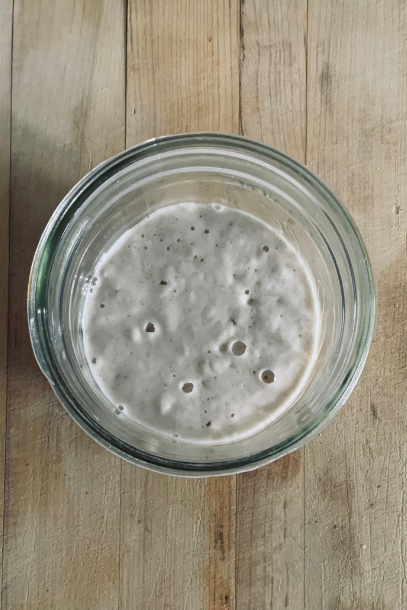
If your starter is too thin, the carbon dioxide gases will quickly bubble, rise, and escape out of the starter, not giving it the rise that you desire.
If your starter is too thick, the bubbles will have a hard time forming, and also never give it the rise that you are looking for.
We are looking for that Goldilocks effect, and need the consistency to be just right. You don’t want it wet like milk, and on the flip side, you don’t want it so thick that it’s hard to pour or even forms a ball. You want it sticky, slightly thick, but still pourable. Like thick, spongy pancake batter.
Temperature
If your starter is rising slightly, but after 24 hours, still has not doubled in size, check the temperature of your home. The ideal temperature should be between 70-75 degrees Fahrenheit. If your house is cooler than 70 degrees, stick your jar in the oven with the light on and the oven off. Don’t forget about it! Another warm spot, is the top of the fridge.
What Is That Dark Liquid On Top Of My Starter?
That is what is called the hooch. Yes, you heard me right. The hooch is an alcohol that is naturally generated from the hungry wild yeast. You can either pour it off or mix it in. It will not harm your starter as long as you attend to it, but it’s a sure sign that your starter is hangry. It’s time to give her more food (flour + water)!
Pin For Later
Now What Do I Do With It?
I highly recommend you head over to this article to read up on how to feed and maintain your sourdough starter. You will find out when to feed it, what to feed it, and how to tell if there are any signs of trouble.
Now, there is only one final and VERY important thing to do! Name it! You must come up with a name for your new pet. You are going to feed it and care for it, so you might as well make it an official part of the family. Ours is named Rita, and she has quite the bubbly personality. I know…lame.
Start Baking!
Learning how to rehydrate a dry sourdough starter is simple and straightforward. By using a dry sourdough starter, you are already ahead of the game with well-established colonies of wild yeast and bacteria that are gut healthy and delicious. You’ll be baking sourdough bread, pancakes, crackers, bagels, muffins, the possibilities are endless. My favorite thing to bake is English Muffins! I hope you enjoy making memories in the kitchen. Cheers to fresh, warm bread, my friends!
Leave a Reply